


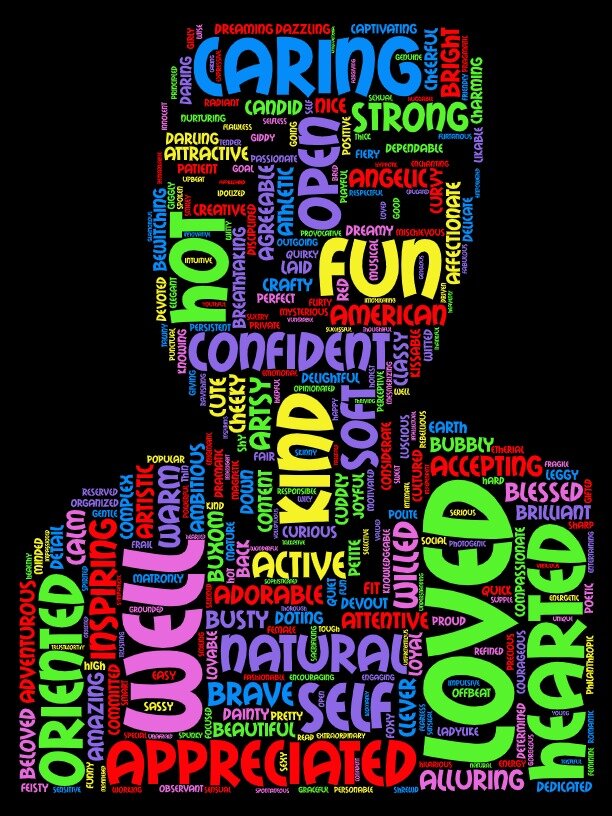
I’ve explored the power of visual representation of text data by creating word cloud portrait
PROCESS

Word cloud text portrait design, I’ve created this project by using WordArt, which is an online word cloud art creator that enables you to create amazing word cloud art. I’ve tried other word cloud tools but this one was very powerful and flexible to use. This online tools have 5 features (words, shapes, fonts, layout and style). The tool provides you to import text either by directly typing it or using the web which will copy all the text from a particular website. You have the flexibility to remove common words such as ”and”, “an“, “the” etc .and numbers. There is an option “Stemming“ reduces words in to a single root. I found the tool very powerful, it populates the individual words within the text. You have the option to make your texts uppercase, lowercase sensitive. The fonts section contains some interesting display fonts but you can also add fonts if you like to. The layout section you can choose how you want your texts to be arrange (horizontal, vertical, random etc.)
I wanted to use my own portrait but the tool also provides some shapes that you can fill with wordclouds. After I downloaded my image I’ve adjust the size and density of text as well as the portrait itself like threshold and edges. you can use the image’s own colors or pick custom color palette.
I’ve used the website Words to Use and selected “Women“ as my subject for this project and use the words to describe women. I don’t know how ethical to use a website like this to describe very sensitive word that contains a lot of meaning. Maybe that would be interesting to use a poem you wrote or lyrics that reflects more personalized adjectives about you.
ADOBE PHOTOSHOP

STEP 1: Insert the image in to photoshop

STEP 2: Outline the image with Quick Selection tool

STEP 3: Mask it and Convert to Smart Object
I’ve explored a lot of ways to create word cloud with the images you like to use. It is also possible to create word cloud directly with photoshop without using any external website. After the 3 step above you can add another layer and write the texts you like to use with type tool and arrange the positions. Then, cmd+click the thumbnail of the text to make a selection of your text and mask it.
I had so much fun doing this assignment. I believe combining the words with an image itself have a very strong impact. It’s also very interesting thinking about what words we choose while we’re describing an image, a portrait or an object is an another subject. What if I would improve this project by trying to describe an abstract form/object with the description of most likely used words.